Tuesday, April 7, 2015

Burda 11-2012-118, Classic Trench

Burda 11-2012-118 Thumbnail

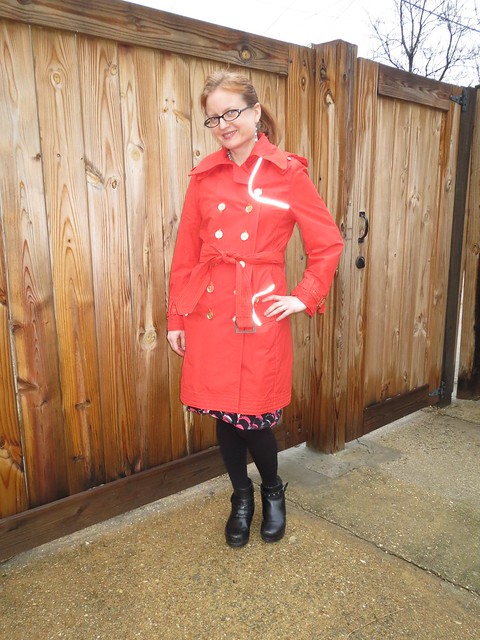
So last Spring, almost a year ago now, I was in a mood to tackle a big project and to do it right.  I don't know why that came over me--it's unusual!  I am more of a "make it in a weekend" gal.  So I decided it was time to make a trench.  Burda 11-2012-118 is *almost* the perfect classic:  it has the separate collar stand, double breast, and gun/rain flaps--but the latter are weird and asymmetrical.  A totally unnecessary variant!  However, it was relatively easy to turn them into the classic look, and the pattern needed only my usual fit alterations to be perfect.

Fabric Mart had some fabulous red water resistant (more on that later) nylon allegedly from Marc Jacobs, I splurged on fabulous hardware from Pacific Trimming, and patiently got started.

Well, back up.  After tracing out and altered the pattern I cut it out in a coated linen I got from Fabric Mart a while back.  Luckily, I thought to actually test the fabric for water fastness before starting to sew.  Not only did the waxy coating on the linen offer no water resistance whatsoever, it seemed to actively soak up water *worse* than your average fabric.  So that's in pieces in my sewing room still.

So with the red fabric, I sewed some scraps together and tested various configurations.  I found that by pressing the seam allowance to one side and topstitching, the seams were surprisingly waterfast and I decided not to use waterproof tape on them.

I got the shell of the outer fabric most of the way constructed using my most meticulous craftsmanship...and then my partner and I bought a house.  So that went into a box for months and months while we moved etc.  Then in October we planned our trip to Italy--two weeks in advance (we had a rough Fall with deaths in each of our families).  And since it was October, it was predicted to rain the whole time we were there.  Eep!  I needed the trench coat, and I needed it now!  So much for taking my time on this project and doing everything right.


Reflective Piping
Taken with Flash to Show Reflective Piping

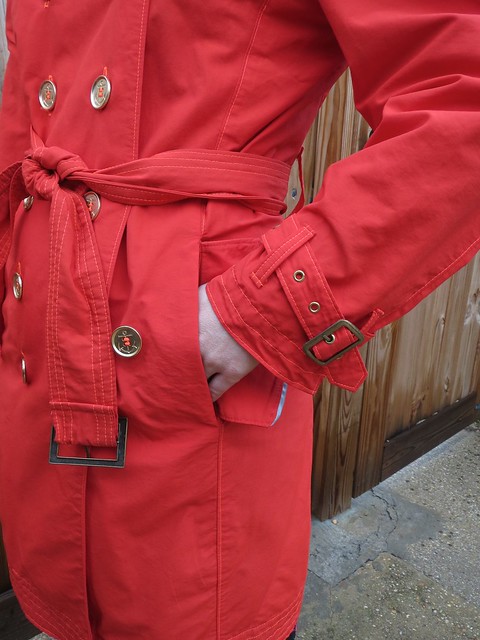
There were a few special details that were important to me.  I wanted to add some reflective piping, to give me more visibility when biking in the rain.  I wanted the front storm flap to be functional.  I wanted the traditional epaulets and sleeve belts, as well as tie-but-belt-buckle belt (I didn't put any eyelets in the belt).  I wanted a chain for hanging it on a hook.  And I wanted a functional but removable hood.

And I wanted all this in two weeks.  Hence, why there are no in-progress photos and no construction information.  I figured I'd rather post (after months of silence) than spend another couple months trying to recreate the construction process.


IMG_4013

I kept a Burberry trench open on my computer at all times and used the zoom function on every possible detail.  In the end, I think I only got one thing wrong.  I looked at the pocket flap over and over and it really looked like it was attached behind the pocket and buttoned in front of it.  I'm still not sure which way the Burberry goes, but I knew at the time it was probably a mistake and it was.  As I discovered while walking home from work in a snowstorm while wearing my trench, the precipitation just blows right into the pocket.  Alas.  I will add a second flap on the front of the pocket so the flaps can button either way, depending on wind direction.
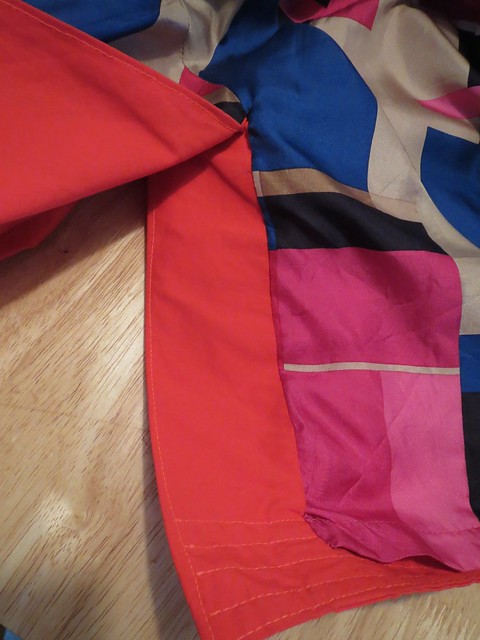
Lined Slit

I think my most proud detail on this doesn't even really show to the casual observer--the lined vent, my first one ever.  I watched this video over and over and it really worked!  It made me extremely nervous to cut away my lining fabric for the underlap side.  I hate doing things that can't be undone.  But I had faith and went forth and the vent is beautiful.


Thousands of Buttons

My stupid mistake was that I haven't made a double-breasted coat in so long that I totally forgot that one row of buttons is functional and the other is supposed to be fake.  I made them all functional.  So there are a million buttons to button if I want to wear this buttoned.  Ah well.  In a way it looks better, because if I just wrap the coat closed and hold it in place with the belt rather than buttoning it, which I do more than actually buttoning it, then you still get the effect of the double row of buttons.
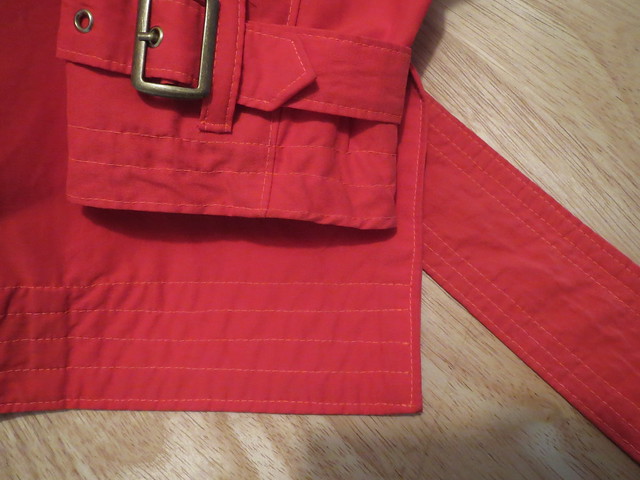
Multi-Row Hem Detail

This fabric doesn't do "crisp."  Cidell kindly took the photos and asked if I wanted to steam it first.  Ha!  In order to give the sleeves and hem *some* body, I sewed multiple rows of parallel stitching, which worked out pretty well.

Believe it or not, the floppy pocket flaps are interfaced in heavy interfacing on both sides.  I also interfaced the lapel to a little beyond the roll line on the fashion layer (as well as fully interfacing the facing).
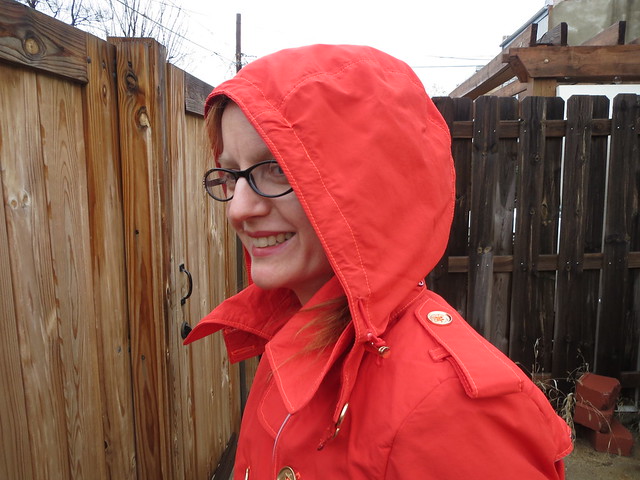

Hood

The only poorly done details on what was supposed to be a meticulous project are some of the buttonholes (appalling) and the hood doesn't really button under the chin.  The hood was the last step and I was sewing it deep into the night before we left the next day for Italy.  I found a Burda pattern with a hood, and shrunk it by about 30%(!) for my tiny child-sized head in a two muslin process.  It amazingly looks pretty good, especially with the sporty mesh lining, but the ends are too thick to work the buttons into the buttonholes without extreme effort.  Luckily, the drawstring (with red elastic cord purchased from Pacific Trimming for a luxe touch, rather than the more readily available generic black) and gold cord stopper keep it in place.
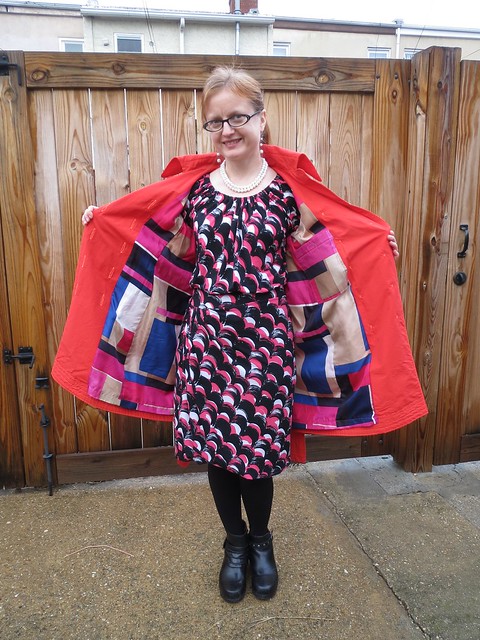
Print Silk Lining

It's lined with a silk print I got on eBay for a great price.  The print has pinks rather than red in it, but I think it works.  I considered adding an interlining layer, but decided I wanted the coat more for Spring/Fall and so the nylon + silk would be warm enough.  In fact, it is the perfect weight.  As mentioned, I was able to wear it when it was snowing with heavier underclothes (but it is not very cold in DC when it snows for the most part--just below freezing) and have already had plenty of use out of this Spring.
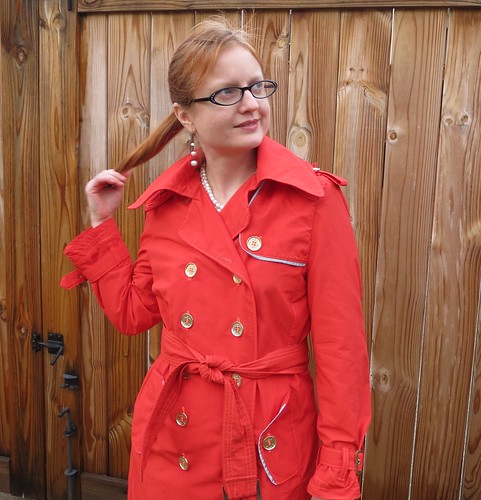

Front Closeup


I was proud to wear this coat in Italy, though I flew too close to the sun and got soaked one day.  Our last morning in Parma we ran out to get cheeses and bread and snacks for a picnic on the train to Bergamo.  It was POURING.  I just wore the coat, no umbrella.  Well, if you have this fabric, let me warn you.  It is water resistant.  There is a big difference between water RESISTANT and waterPROOF, as it turns out, and I got absolutely soaked.  In a light rain it's great.  In a heavy rain, you have about 10 minutes of comfort and the rest of the day of drowned rat.  It's no substitute for an umbrella!  I had a moment of rage that I had put so much work into something that was supposed to last for at least a decade and it didn't function as intended.  But now I'm over it.  And really enjoying wearing this in our light Spring rains!

All photos are here and the pattern review is here.
Friday, January 16, 2015

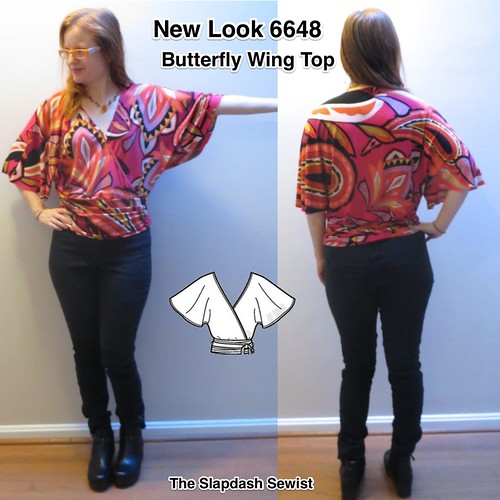
New Look 6648, Butterfly Wing Knit Top

NL6648 Thumbnail

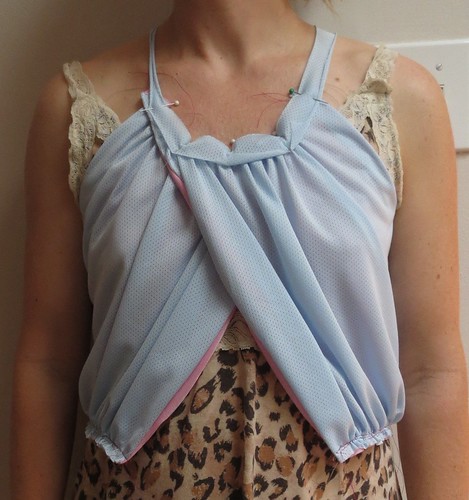
New Look 6648 has been a perennial favorite at PR, but for some reason very few people have made this butterfly wing view, perhaps because it is an insane fabric hog.

This was one of my quickie makes before my trip to Italy in October.  We were going to have cool but not cold and probably wet weather, so I was looking for transitional tops.  This is probably too much fabric to wear in the heat of summer, but for early fall it was perfect.  I also wanted tops that could go with leggings.  Though this isn't long (I seriously cannot find any long tops that will work for my wide-hipped, belly-pooched self), the volume up top is a nice contrast to a fitted bottom.

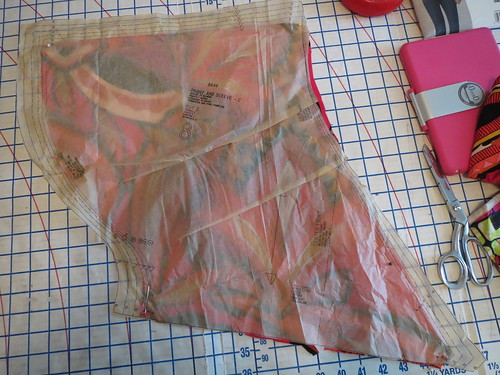
Shorten Crossover for SBA

The top is very simple and only required a little bit of alteration.  As usual, I shortened the crossover for a small bust adjustment.

This is still quite drapey and I ended up tacking the two sides together at center front.  This is always a defeat for me--sewing should mean never having to tack a wrap style into place!  But at least I didn't have to resort to the safety pin of shame.


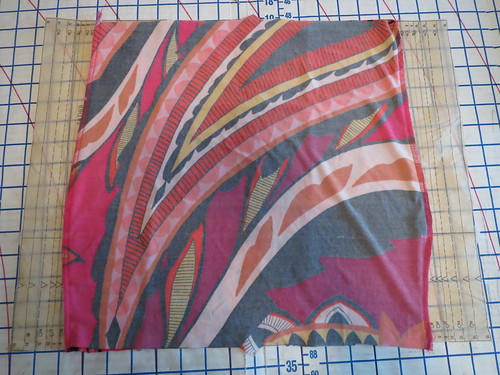
Shape Band

The lower band is drafted as a straight rectangle.  I altered it to have a tiny bit of waist shaping--you can see the bulge about 2/3 of the way down.  The bulge is the bottom of the band; only the top layer is gathered so the bulge is not in the center.  The top and bottom edges are the waist and are a little bit smaller than the bulge fold/hip.


Gather Single Layer


The instructions have you gather the side edges of the band, then stitch.  I find it harder to do that than to sew the seam, then put in the gathering stitches on either side of it.


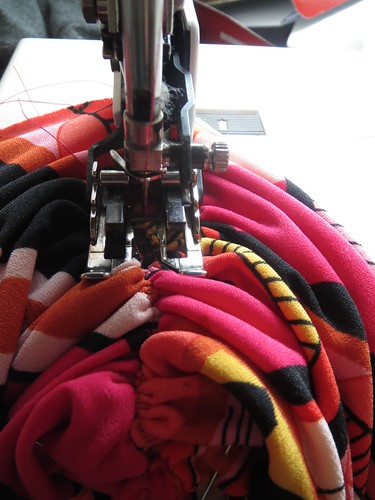
Walking Foot to Stitch Down Ruching


Once I pulled on the threads to gather the upper ruched band to the fit the under non-ruched band, I used my walking foot to zigzag the gathers in place.


Dart at CB


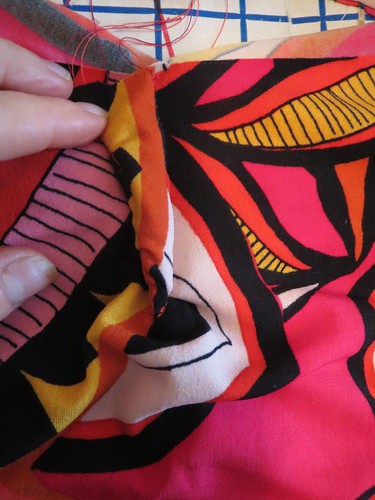
The small amount of waist shaping I did at the cutting/sewing stage on the band was definitely not enough to deal with my swayback.  Before attaching the band to the bodice I took a large dart at the upper edge of the band at center back. Next time I will just cut it with a CB seam pieces and integrate the dart into the seam.


CB Dart, Outside


I gathered the outer layer of the band before stitching the dart, so there is ruching in the dart.  It made for a very thick dart, which I cut open and trimmed before attaching the bodice to reduce the bulk.  Taking out this width in the band required slightly gathering the bodice before attaching it to the band, but this is in line with the style.

I finished the neckline by serging clear elastic to the inside at the raw edge, then turning under and twin needling.


Hiking


I wore this for our beautiful day of psuedo-hiking in Bergamo, Italy (we were mostly on a road, so it wasn't much like hiking).  Admittedly, it looks a little weird with my athletic skants here.

Front


However, it does look good with skinny jeans, which was the whole point!


Closeup

The lighting in my new photo spot in the house is still quite challenging, but I'm sort of getting there.

With this closeup you can notice that the crossover is tacked if you think about it, but I don't think it's *too* obvious.

All in all, this fabric hog is worth the fabric in my opinion.  It's a fun look that hides a multitude of pasta!

All photos are here and the pattern review is here.
Wednesday, December 10, 2014

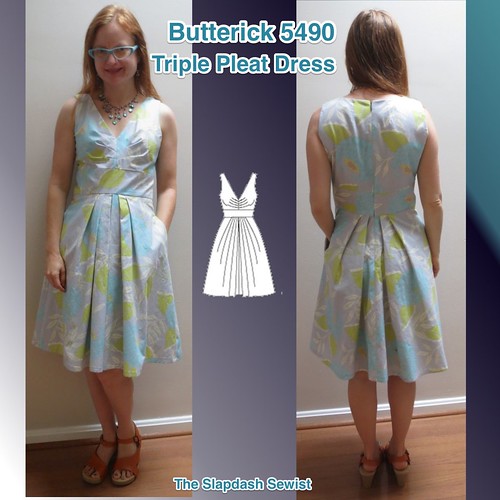
Butterick 5490, Triple Pleated Bodice Dress

Butterick 5490 Thumbnail

Sorry for my long disappearance!  I didn't mean to leave with no warning.  We had a series of deaths in the family, then went on vacation to get away from things, then the holiday season began...  Also, and this is so silly, but I *still* can't figure out how to get good pictures in my new place.  I tried a new location that might work.  I have been sewing a fair amount--especially right before my trip!--and hope to blog more regularly, at least once the holidays are over.  Thank  you to all who checked in on me; I really appreciate hearing from my sewing friends even when I appear to have dropped off the face of the earth!  I miss everyone.

And due to my long absence, I am way off schedule for the seasons.  I made this during the pattern contest, which was in July.  It's not getting much wear now!


Butterick 5490 has been on my list for a while now.  If you remember the Banana Republic Mad Men collection from a couple of years ago, the Betty Dress was quite similar in terms of the triple pleat in the bodice and the full, center pleated skirt (there's a front view here).

I knew those triple pleats would pose a small bust problem even more than usual, as all the reviewers observed that the pattern would not be flattering to a small bust as drafted.

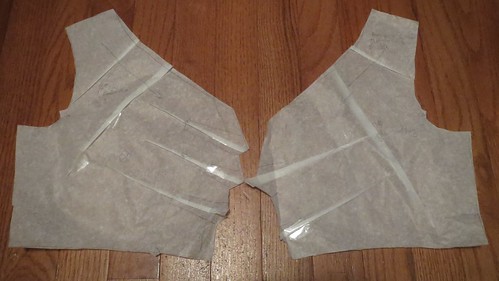
Small Bust Adjustment Bodice and Lining

I folded out width from each of the pleats, as well as shortening the neckline between the bust and the shoulder.  The pattern has a separate front bodice lining piece, a luxe touch I appreciate in these designer patterns (this one is a Suzi Chin/Maggy Boutique), and so the lining needed to be separately altered.  The triple-pleat fashion-fabric bodice is on the left, and the double-darted lining is on the right.

Having worn the dress for a day, I realized I need to scoop some width out from the front armscye as it is digging into my arm.  This is likely to do with my forward shoulders/bad posture.

Broad Back Adjustment

On the back, I did my usual broad back and swayback adjustments as well as my fairly standard addition of a dart in the back neckline to prevent gaping from my forward head/bad posture.

This fabric was $1.99/yd from Fabric Mart, the special when I made the order.  I love the huge print and the colors, especially the little touches of orange.  I'm pretty sure it's a quilting cotton, though a good quality one.  As such, it is only 45" wide and I couldn't cut the front skirt the full width it was intended.  I cut the skirt as wide as I possibly could, but lost a pleat and about 10 inches of width.  The skirt is still plenty wide!


Interface Neckline of Fashion Fabric

Having learned my lesson on past projects that ended up with stretched out necks, I interfaced the fashion fabric and the lining at the neckline and armscyes.  The neckline feels firm and like it will stay in shape.

To make my quilting cotton a bit firmer I also interfaced the entire midriff.  This turned out to be a good decision.  Although I have totally adequate ease in the midriff (nearly 2 inches), the midriff has arrows radiating from the side seam toward the center.  When I lift up the neckline the arrows disappear, so I think they are due to the weight of the skirt on the midriff rather than the fit (good thing I didn't cut the front skirt in two pieces at the full width and make it even heavier!).  I imagine it would look even worse without the interfacing.  I'm not sure how to solve this problem in the future, except for just using lighter weight fabric so the skirt is not so heavy.

Assembled Front and Back Separately

Because I'm a little out of practice in sewing the Big 4, I wasn't sure how this would fit.  To give myself maximum possible adjustability, I assembled the front and back as separate units (the front and back bodice need to be separate anyway to do an all-machine clean-finish lining) so I could adjust along the side seam on the bodice, midriff, and skirt as needed.  As it happens, apparently the sizing hasn't changed at Butterick, because it was perfect with the seam allowances as drafted (I cut an 8 at the shoulders/bust and a generous 10 at the waist).


Front Bodice Closeup


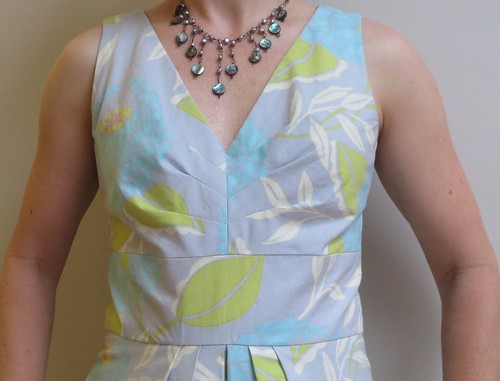
The final bodice fit is very good.  The bust fits well (though it definitely has ease) and is flattering.  I should have taken a tiny bit more length out of the front neckline, which sits away from the body a little bit.  The neckline is also surprisingly low, lower than conveyed on the model I think.  I might raise it up 1/2 inch next time.

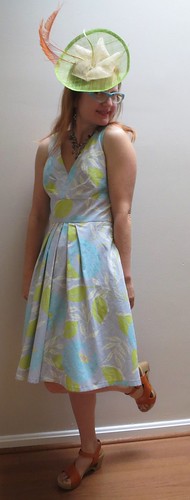
With Hat


All in all, a fun sundress for our cool summer!  I had a little fun with pulling out one of my hats for a vintage style look.  With the width of the shoulder this would be easy enough to pop sleeves on for a Fall/Winter look, though I'd probably go with a less voluminous skirt rather than the wide pleated sundress look.

All photos are here and the pattern review is here.
Thursday, September 18, 2014

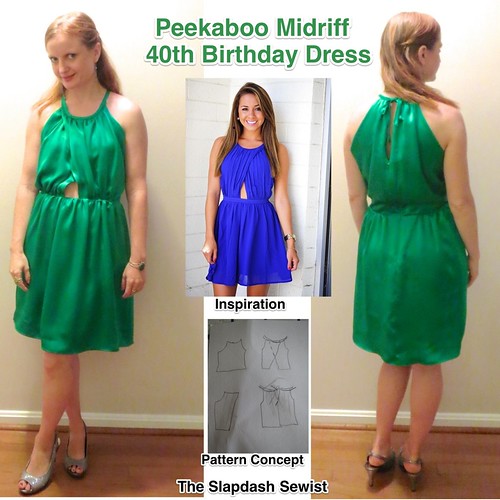
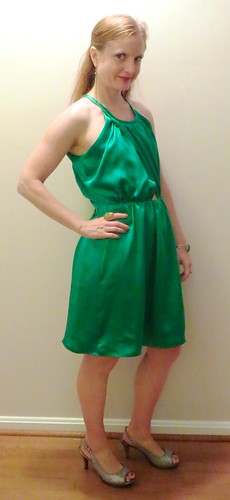
Peekaboo Midriff 40th Birthday Dress


Peekaboo_Midriff_Dress_Thumbnail

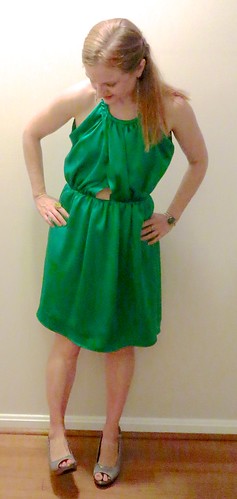
I have been a little obsessed with cutouts lately, I'm not sure why.  I put together a Pinterest board and the one that really struck my fancy was this (at right).  And of *course* it had to be just a hosted image, with no link, information, back view, or front view without her hair covering the shoulders.  But I got the gist.

I decided to make my birthday dress out of some gorgeous green silk I picked up at Paron in New York in August.  The color is that of the famous Atonement dress, but having neither Keira Knightley's willowy body type nor the Gatsby existence calling for full-length green silk gowns (nor enough fabric either--I just barely eked this out with nothing to spare once I made my self bias tape), this dress it was.

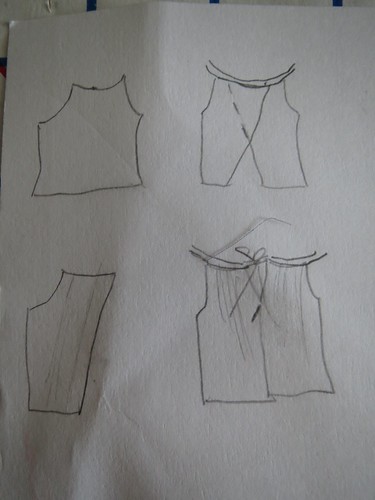
Pattern Concept Drawing
The first step was drafting the bodice.  I drew up what the pattern should look like (sadly, I do not have a future career in fashion illustration!) and went from there.

I considered starting with McCall 5880, which has the right shape at the armscye as well as the look I wanted for the back.  But it has an empire line, which I didn't want and I decided it would be more work than starting from scratch.

Then I remembered that I had turned my woven tee into a raglan version using the same method as for my knit tee.  Perfect place to start!

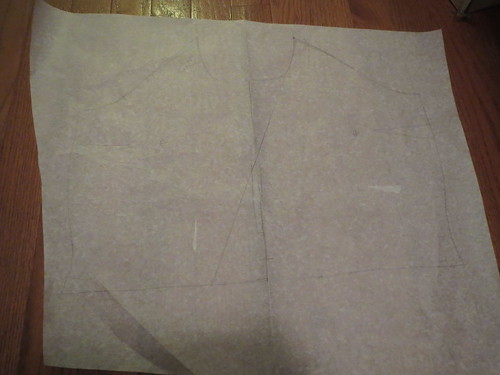
Pattern Drafting


I first created a full width front pattern (rather than cut-on-fold).  I narrowed the front neckline 1/2 inch on each side.  I marked 2 1/2 inches on each side of center front at the lower edge for my cutout.  Then I made a diagonal marking from the corner of the neckline to my 2 1/2" mark.

I mocked up a quick muslin of the bodice front, using hair clips and pins to attach it to my raglan blouse and tried it on.  Whoa.  The opening was a bit much.  You can't really tell from the top laying flat, but we were definitely in bra-flaunting territory.

So for muslin #2, I narrowed the width from center front to about 2 inches on each side, and rather than cut a straight diagonal line I curved it a bit to give more coverage.  This muslin was what I was looking for, so I moved on to the drapey part.

Adding Volume to Front Bodice
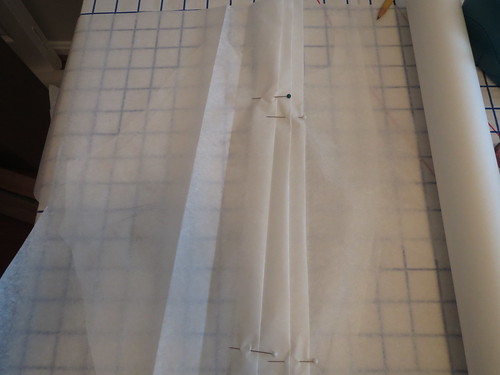
To get volume in the front, I first folded out three large pleats in my tissue paper to build in volume, then traced my pattern (the original pattern became the lining).  I didn't have any particular measurement of volume in mind, so I wasn't too scientific about my pleats.  Each pleat was probably about two inches wide (so, encompassing four inches of tissue because of the folds).  I also rotated the bust dart to the neckline.

For the back, I made a diagonal cut from the neckline to the hem and added a wedge of tissue paper, as I didn't want additional volume at the back waist.

Second/Final Muslin


I cut out muslins of the front and back overlays and made a quick mockup of the full bodice--pretty much exactly what I wanted!  The pattern drafting process ended up being much simpler than I expected.

Final Bodice and Lining Pattern


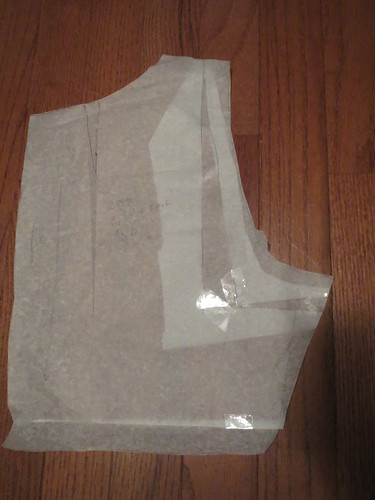
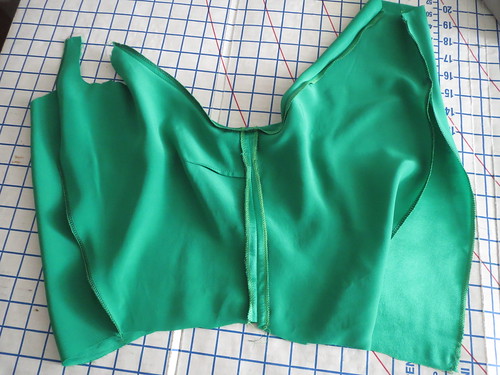
I cut the bodice and bodice lining from the fashion fabric because I didn't want the lining to roll over and show anywhere.  Here you can see what the final pattern pieces looked like for the bodice.

I used the skirt from Simplicity 1796 and I cut the skirt lining from Butterick 5315.  For the skirt lining, I made a facing for the center front at the opening, so there wouldn't be any lining show through.


Sew Bodice and Lining at Armscye, Center Front, and Upper Center Back

Construction was pretty simple.  I started by sewing the side seams of the outer and lining pieces.

Next, I sewed the outer pieces and lining together at the armscye, diagonal center front, and upper center back, and turned and pressed.

Gather Bodice and Baste to Lining


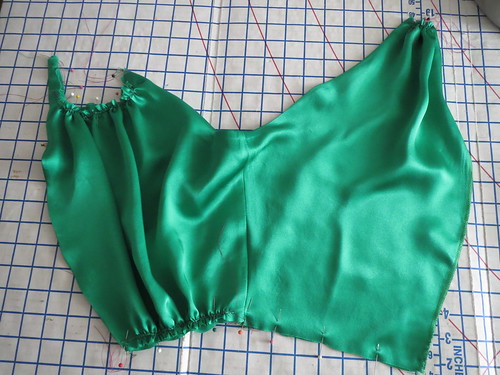
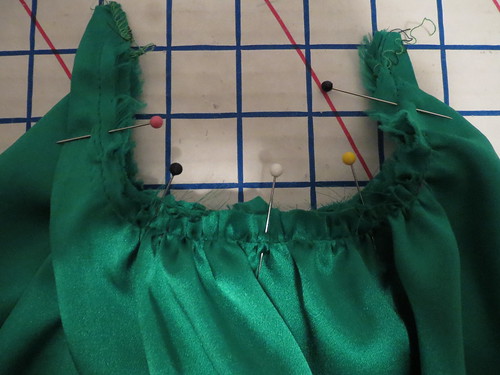
Then I put in the basting stitches for gathering on the outer pieces and pulled the gathering threads to match the outer piece with the bodice lining, basting the outer fabric to the lining fabric at the neckline and the lower edge.  I left the lower edges separate about 2 inches from center back.

Match Centers Front


Once basted, I matched up the centers front at the neckline and pinned the left and right halves of the bodice together.

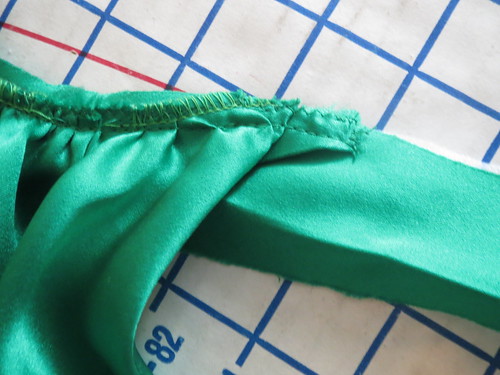
Bias Binding to Wrong Side


To finish the neckline, I used self bias tape.  Because the entire weight of the dress hangs from the bias tape at the shoulders, I reinforced the shoulder areas with interfacing.

I first sewed the bias tape to the wrong side of the bodice.  At the corners of the front neckline, you need to sew the bias tape to the very lower edge of the corner so that the raw edge will be fully enclosed.

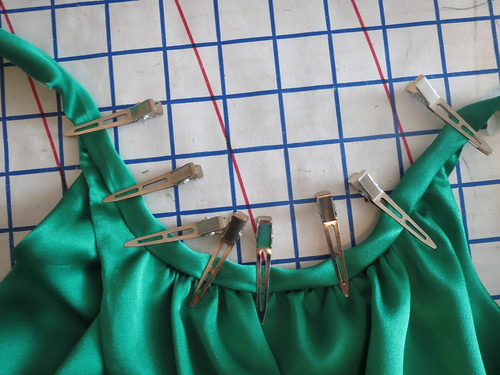
Turn Bias Binding Over to Right Side


I then turned the bias strip to the right side and used the hair clips to hold the bias tape in place so I wouldn't leave pinholes in my gorgeous silk.


The skirt and lining were constructed separately with french seams at the side seams. The center back seams were left open in order to sew in the zipper.

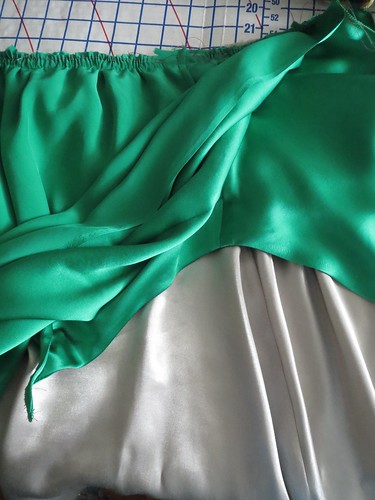
Sandwich Bodice between Skirt and Lining

I gathered the outer skirt at the waist. The skirt lining is an A line fitted at the waist to reduce bulk.

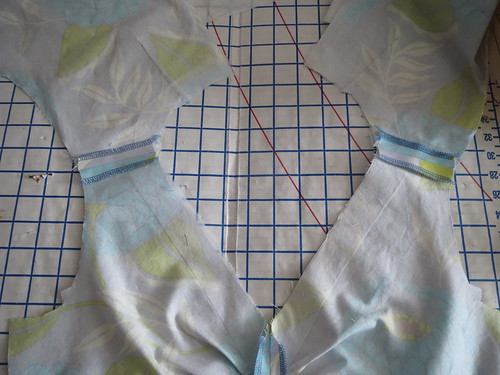
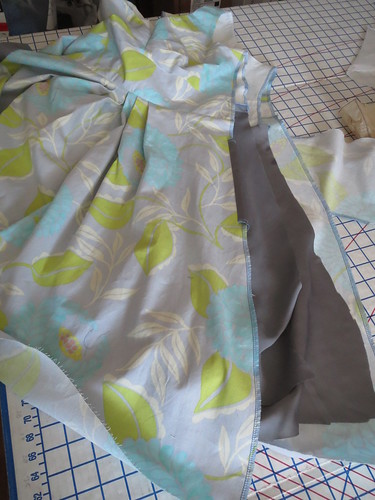
To join the bodice and skirt, I sandwiched the bodice between the skirt and the lining and sewed together at the waistline, leaving the last two inches before center back open--this was for later doing a neat finish at the zipper.

I separately sewed the outer skirt to the bodice all the way to center back, leaving the lining free.  Then I sewed the skirt lining to the bodice lining all the way to the center back.

After reinforcing my fabric with strips of interfacing, I installed an invisible zipper below my finished center back neckline opening.

Stitch Bodice Lining and Skirt Lining


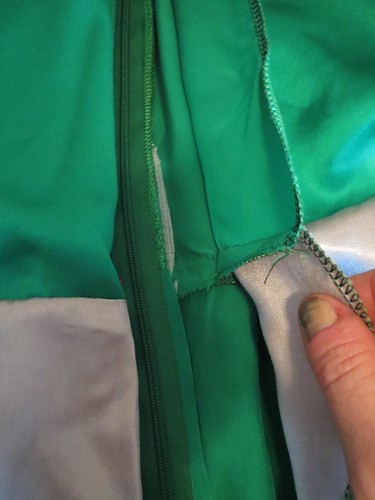
I had not been quite sure how I was going to finish the lining at the center back, but luckily it all worked out well!  Remember that I had left the lining and the outer pieces free for the last two inches before center back.

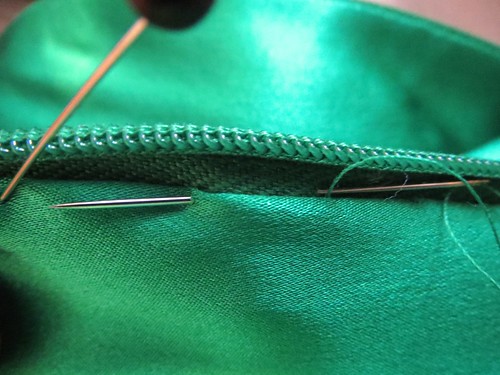
Hand Stitch Lining to Zipper


folded the edges of the lining in and then hand stitched with tiny stitches to the zipper tape.

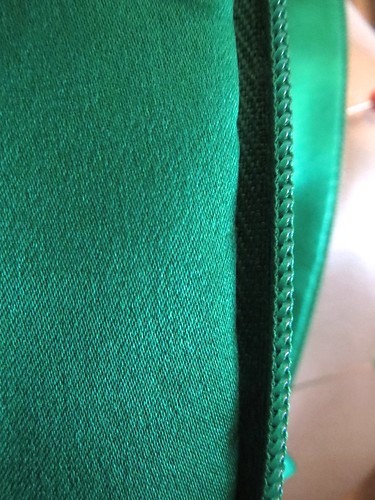
Invisible Hand Stitch Lining to Zipper


The finish is very neat on the inside, and the hand stitching is only barely visible.

Blogger Pose

I was thinking this style was a departure for me, but then I remembered I made a knockoff very similar to this in 2007 (though apparently never blogged or PR reviewed).  The seven years later version shows less skin, though.  Still, I guess that shows my taste is pretty consistent!

Side

I love the way the dress came out.  It is not perfect--it is a little loose at the armscye (which I really don't understand, because the top with sleeves is more on the too-snug side than the too-loose side); the front drapes slightly askew/agape; and I'm honestly not sure what's going on with the back waist--the pattern I started from had a swayback adjustment built in yet somehow it needs another 2 inches taken out.  A full muslin and another round of pattern adjustment probably would have fixed those things.  But I've always considered it paradoxical to put so much careful effort into special occasion dresses that will be lucky to see five wears rather than wardrobe workhorses that will be worn a couple times a month in season for five years.   Not perfect is fine with me.

It was fun to do a drafting project that worked out and actually matched my inspiration!  Alas, I haven't actually had the chance to wear the dress.  It was pouring on my birthday and I didn't want to ruin it!  I just need to plan fancy cocktails soon...

All photos are here and the pattern review is here.
Thursday, September 11, 2014

Book Review: The End of Fashion by Teri Agins

I read "The End of Fashion" so you don't have to.  If you have it on your to-read you should probably take it off.  I found it mildly interesting as a piece of fashion history, but it was hard to get through.  Agins covers, among other things, Paris as the center of the fashion universe, the story of designer/movie star synergy, and the (temporary) reprieve Marshall Field's bought itself as a strictly high-end merchandiser.


I had to google "Hilfiger Vintage" to find this.
Writing in 1998 or so (the book was published in 1999), Agins argues that fashion is dead.  Forever.  When you read the book you remember why this would be easy to believe:  this was the height of Tommy Hilfiger Hegemony, as covered in a chapter of the book.  Those hideous oversized color-blocked sweatshirts were all over the damn place.  Less facetiously, there was also the perpetual issue of couture being a huge money-loser, and fashion people making very bad business people (the chapter on Donna Karan is a great illustration of this principle).

However, the title has more to do with timing than absolute truth.  This quote encapsulates the era Agins recounts:  "Glamorous as they are, fashion shows are fairly low-voltage to the general public, who will probably never see a tape of an Armani runway show." (p 152).  Thank you for that prediction, Professor Trelawney.


Ad Copy:  Gives Even Svelte Teen Sensations Tummy Pooches!
Agins was writing in the dead zone between the easing of American economic protectionism that began to allow cheap clothes from Asia to flood the market (the Multi-Fiber Arrangement was phased out by 2005) and the rise of the fashion blogger.  In those dead zone years, fashion was pretty grim.  Think of those heinous jeans the 90210 crowd wore(and don't miss this horrendous pair on Shannen Doherty).
.
With the rise of the Internet, the top-down model Agins writes about no longer became the only paradigm.  Designers, department stores, and fashion magazines have by no means lost their influence on fashion (as evidenced by the awesome "cerulean" monologue in The Devil Wears Prada).  But what used to be "street fashion," which certainly had some influence in the past--though mainly as it was coopted by movie costume designers and the fashion industry--became fashion blogging, and far surpassed the IRL version in terms of influence.

As fashion became democratized, couture became no longer the stuffy province of the ultra-rich old money and ordinary people could get excited about and participate in fashion in a way that has not been possible at any other time in history.  Someone with a strong point of view could go from being a random teenager in the midwest to seated in the front row at a runway show (or so we like to imagine).


In addition, business people started to take over the business end of fashion.  Whether LVMH's ownership of a huge swathe of the luxury fashion brands is a good or a bad thing, it has meant that fashion houses have managed to stay afloat and continue to offer couture eye candy.

Of course, nothing is static.  The new fashion hegemony seems to be that fashion bloggers are sponsored and branded and all strive to be sponsored by (and feature) the same clothes, so there is less of a richness of fashion point-of-view and the designers/marketers are back on top in deciding the Next Big Thing.  However, I'm not going to go as far as Teri Agins and predict the end of fashion.  Humans will always have a keen interest in adorning themselves, regardless of how low the trough seems to have dipped.